


A quick-start guide on hosting Express on Upsun


Welcome to our quick-start guide on hosting Express (at the time of writing, the most recent version of Express is 4.18.2) on Upsun where we will demonstrate just how simple it is to host your Express projects on our PaaS.
Before we get started, for the purpose of this tutorial we will assume that you have already installed the Upsun CLI locally.
Get started locally
If you already have an existing GitHub repository with a functional Express source code, clone it locally using the following command and then jump to the second step: Configure your project.
git clone git@github.com:<YourRepoUrl>.git
Initialize your local project
First things first, if you don’t have a local Express project yet, you need to create a new one locally following the Express installation guide. Please refer to all of the steps of the installation guide for full details, but to summarize, these are the four commands needed to create an Express application locally as seen below:
mkdir my-express-app
cd my-express-app
npm init
npm install express
Initialize your Git repository
Once you’ve created a new Express project locally, it’s time to initialize the local Git repository and commit local files, using the following command:
git init
git add package.json package-lock.json
git commit -m "Init Express application"
Add a Hello World route
To ensure your Express application is easily testable, you need to create your first Express page. To do so, create a new index.js file at the root of your source code, it will contain a basic Hello World script, as seen below:
const express = require('express')
const app = express()
var port = (process.env.PORT || '3000');
app.get('/', (req, res) => {
 res.send('Hello World!')
})
app.listen(port, () => {
 console.log(`Example app listening on port ${port}`)
})
Then commit your file using the following commands:
git add index.js
git commit -m "adding a Hello World"
Create your GitHub repository
The next step is to create a GitHub repository, to do so follow the official GitHub guide which provides all of the information you need.
Push source code to your remote repository
The final step of the local setup is to push your source code to your remote GitHub repository, using the following command:
git remote add origin https://github.com/OWNER/REPOSITORY.git
git push -u origin main
Configure your project
To host your Express application on Upsun, some YAML configuration files are needed at the root of your project to manage the way your application behaves. See the code to automatically generate them below. These YAML configuration files are located in a .upsun/ folder at the root of your source code, the architecture of which will look like this:
my-express-app
├── .upsun
│   └── config.yaml
├── [.environment]
└── <project sources>
To generate these YAML files, run the command upsun project:init from the root of your Express project and follow the prompts, as you can see below:
upsun project:init
Welcome to Upsun!
Let's get started with a few questions.
We need to know a bit more about your project. This will only take a minute!
✓ Detected stack: Express
✓ Detected runtime: JavaScript/Node.js
✓ Detected dependency managers: Npm
Tell us your project name: [app]
                       (\_/)
We're almost done...  =(^.^)=
Last but not least, unless you're creating a static website, your project uses services. Let's define them:
Select all the services you are using: []
You have not selected any service, would you like to proceed anyway? [Yes]
┌───────────────────────────────────────────────────┐
│   CONGRATULATIONS!                                │
│                                                   │
│   We have created the following files for your:   │
│     - .upsun/config.yaml                          │
│                                                   │
│   We're jumping for joy! ⍢                        │
└───────────────────────────────────────────────────┘
        │ /
        │/
        │
  (\ /)
  ( . .)
  o (_(")(")
You can now deploy your application to Upsun!
To do so, commit your files and deploy your application using the Upsun CLI:
  $ git add .
  $ git commit -m 'Add Upsun configuration files'
  $ upsun push
The upsun project:init command will automatically detect that you’re using an Express stack, ask if you want to add any services (please don’t add any for now), and generate the corresponding .upsun/config.yaml YAML files, like so:
# Complete list of all available properties: https://docs.upsun.com/create-apps/app-reference.html
applications:
 app:
   source:
     root: "/"
   type: "nodejs:20"
   mounts:
     "/.npm":
       source: "storage"
       source_path: "npm"
   web:
     commands:
       start: "node index.js"
     upstream:
       socket_family: tcp
     locations:
       "/":
         passthru: true
   build:
     flavor: none
   hooks:
     build: |
       set -eux
       npm i
# Full list of available services: https://docs.upsun.com/add-services.html#available-services
#services:
#  db:
#    type: postgresql:15 # All available versions are: 15, 14, 13, 12, 11
# The routes of the project.
# More information: https://docs.upsun.com/define-routes.html
routes:
 "https://{default}/":
   type: upstream
   upstream: "app:http"
 "https://www.{default}/":
   type: redirect
   to: "https://{default}/"
Then commit your new files, using the following command, and the project configuration is complete:
git add .upsun/config.yaml
git commit -m "Upsun config files"
git push
Create a new Upsun project
The next step in setting up Express on Upsun is to create a project which is simple to do via the Console. On your Console homepage (all projects), in the top right corner, please click on the create project button, as seen below:


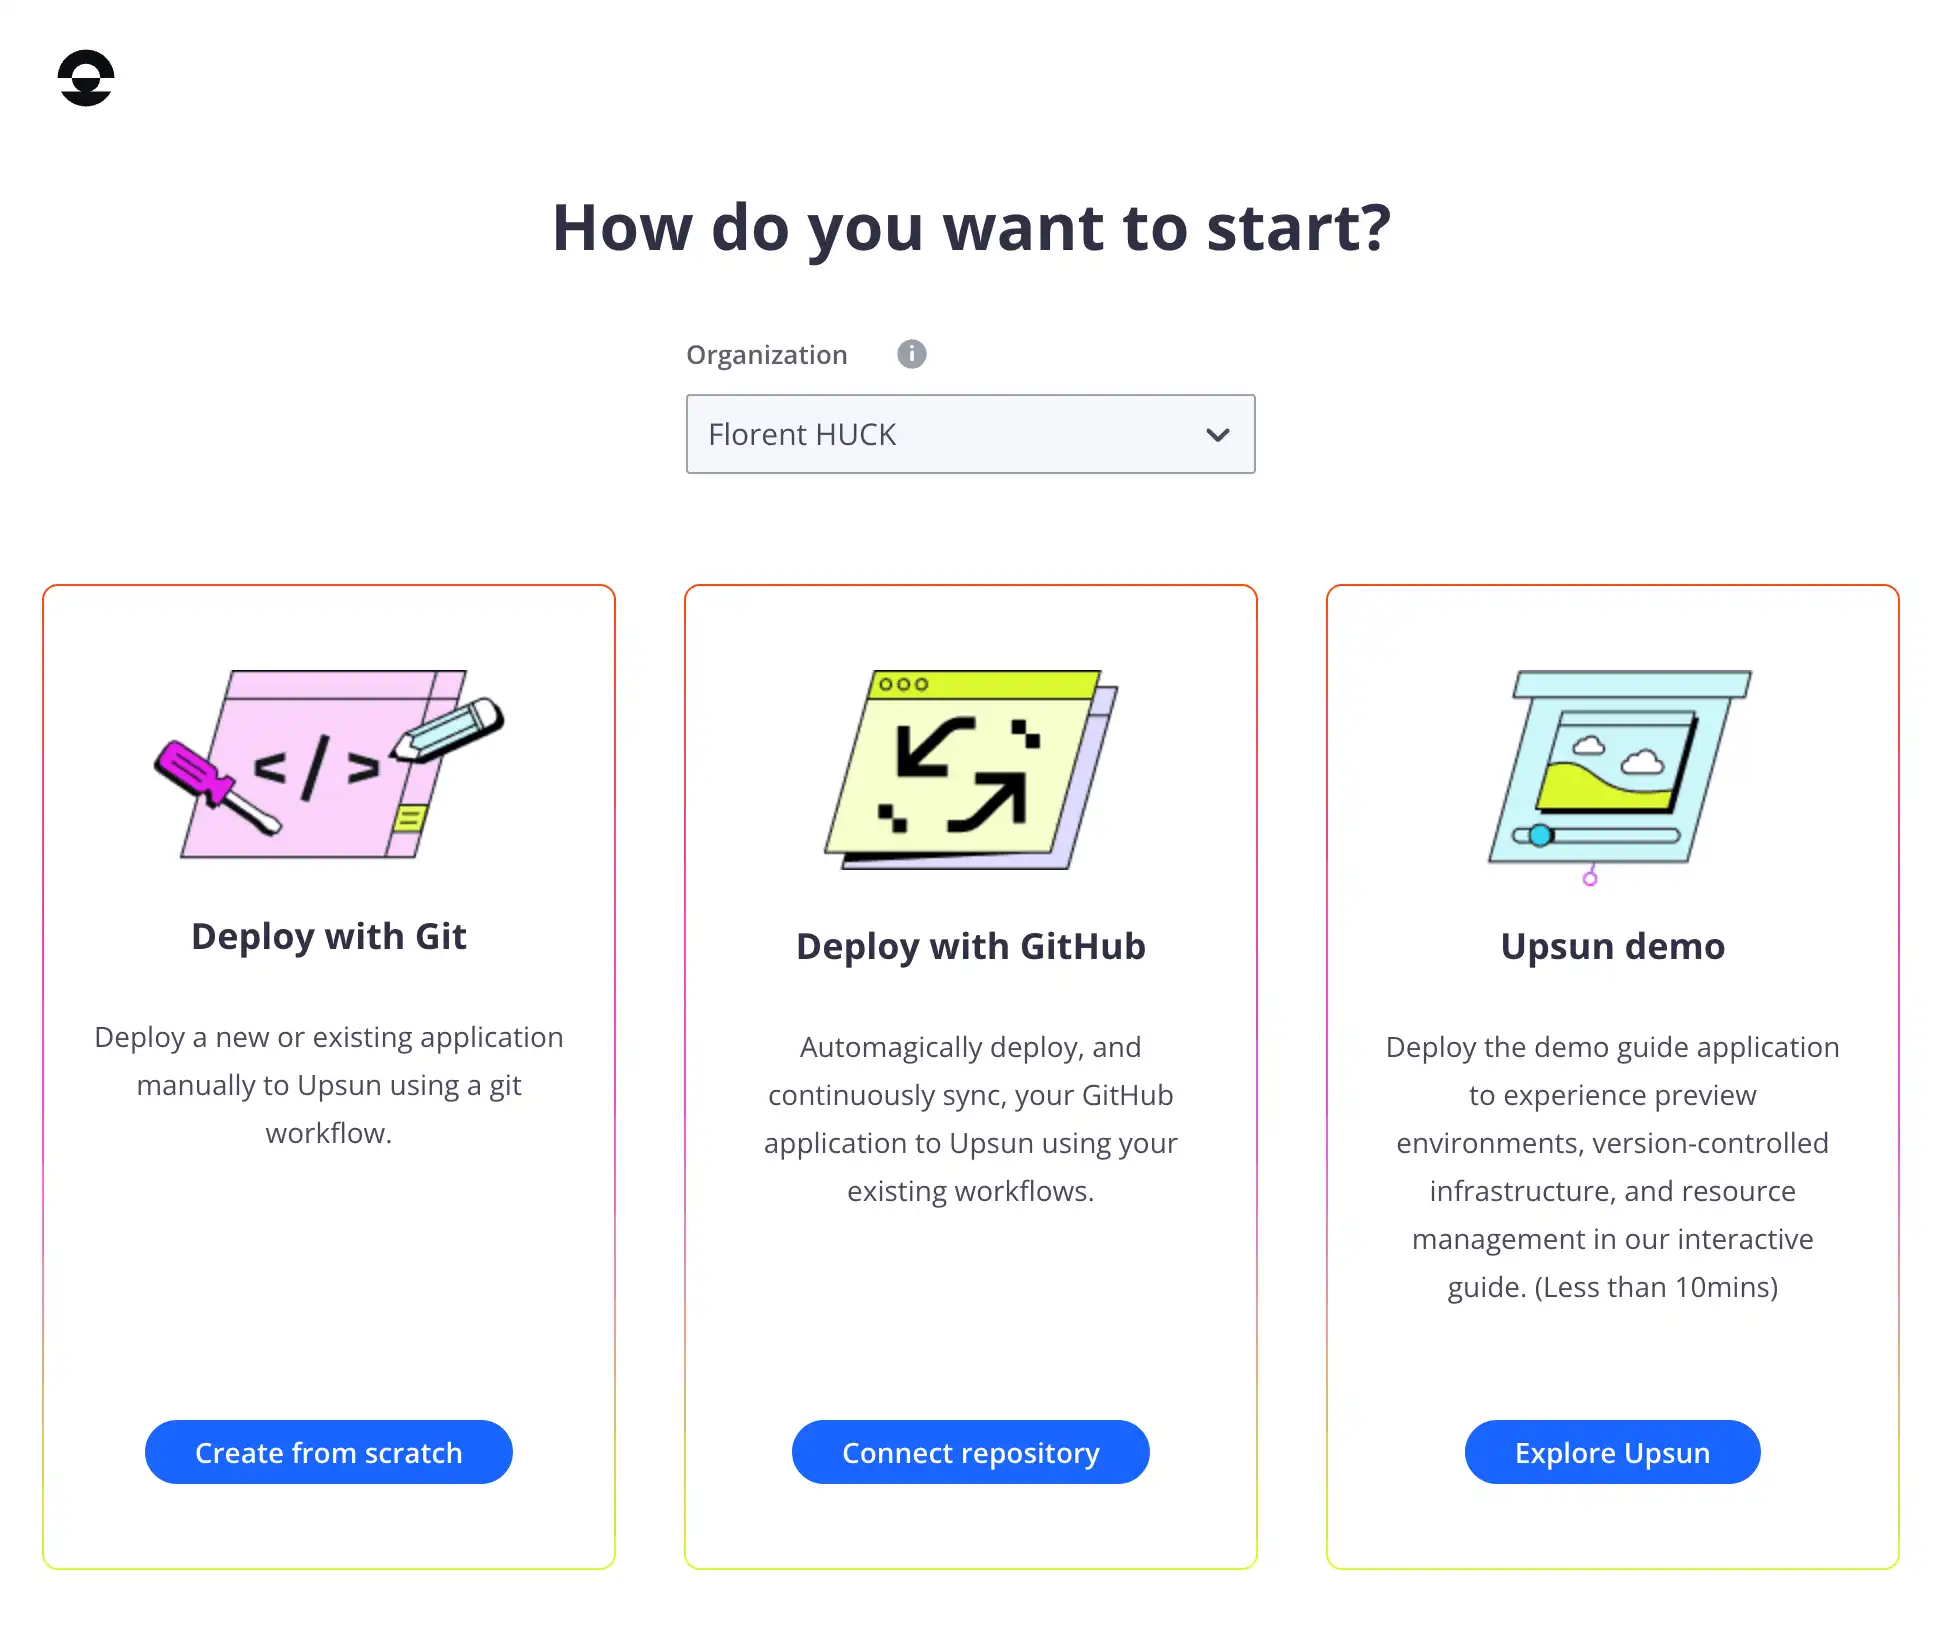
If you do not already have an organization created to put the project into, you’ll first be instructed to create one. Once you have done so, select that organization from the dropdown, and then select Deploy with GitHub, as seen in the screen below:

Then select Connect with GitHub from the options provided as seen here:


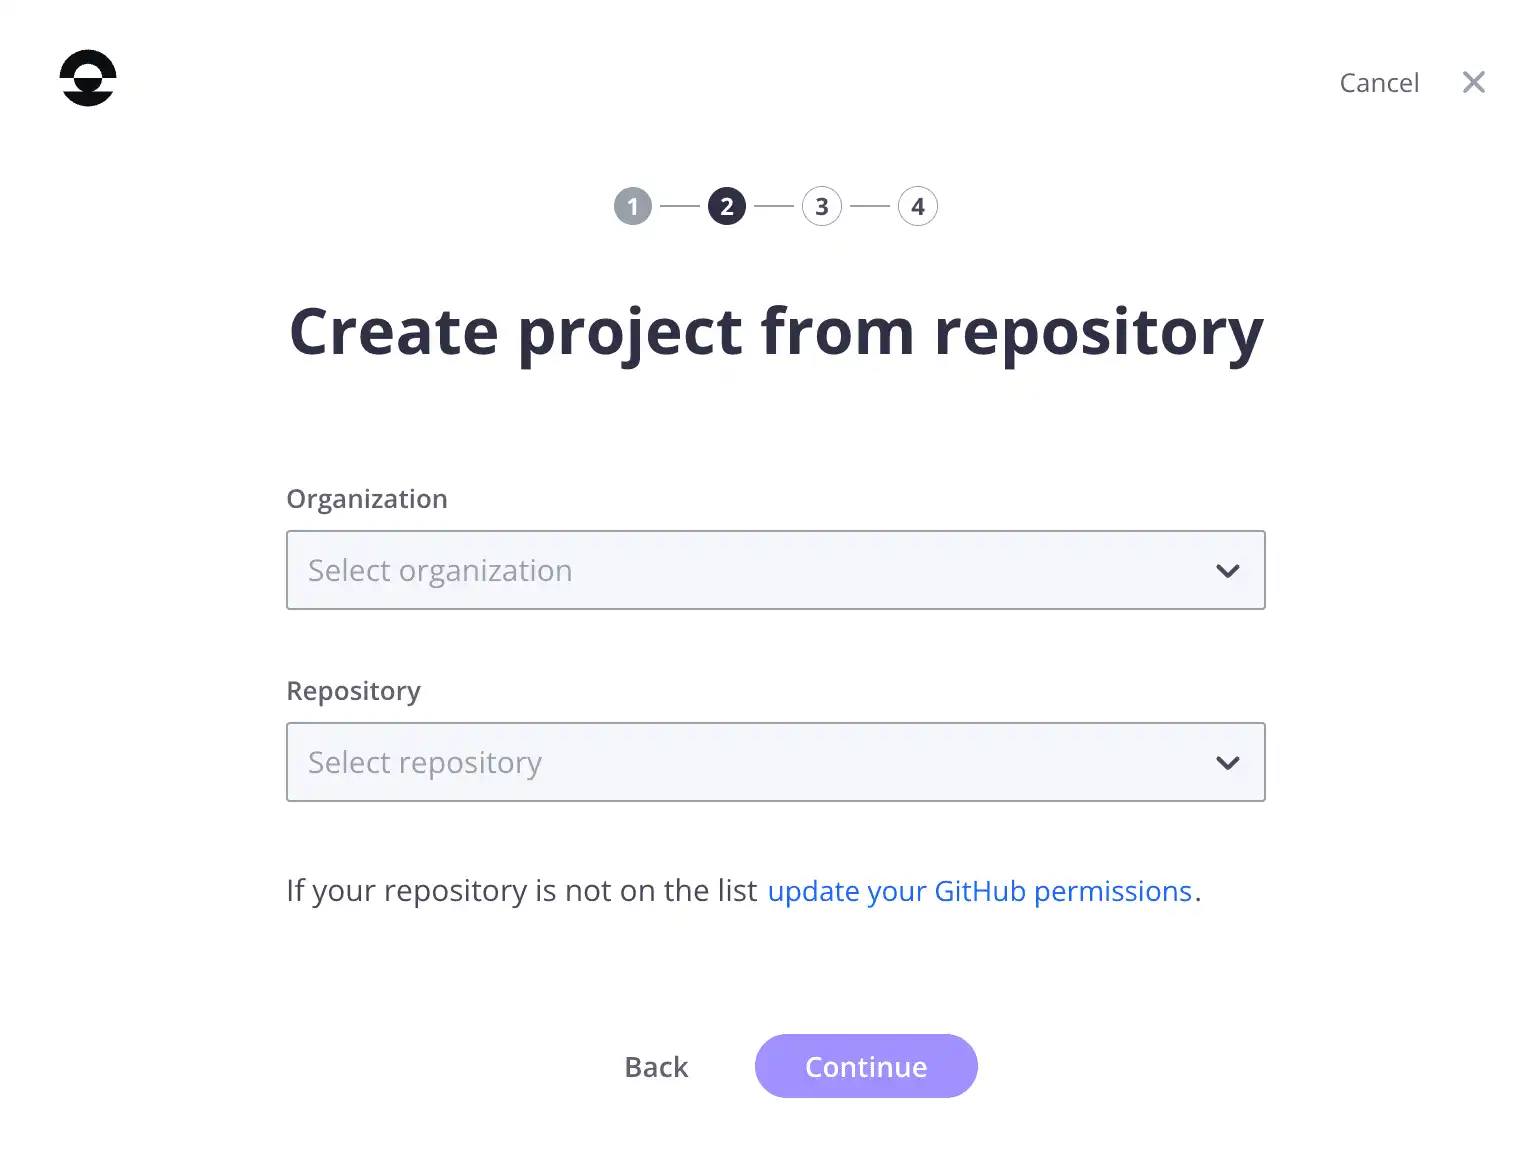
In the next form that appears as seen in the screen below, select your GitHub organization from the first dropdown and then select Install & Authorize and fill out the GitHub credentials. You will need to select your GitHub organization and previously created GitHub repository and select Continue.

You will then be taken to step three of this setup—as seen below—where you will fill in various details including project name, environment name, and region. Once you’ve done so, select create project.


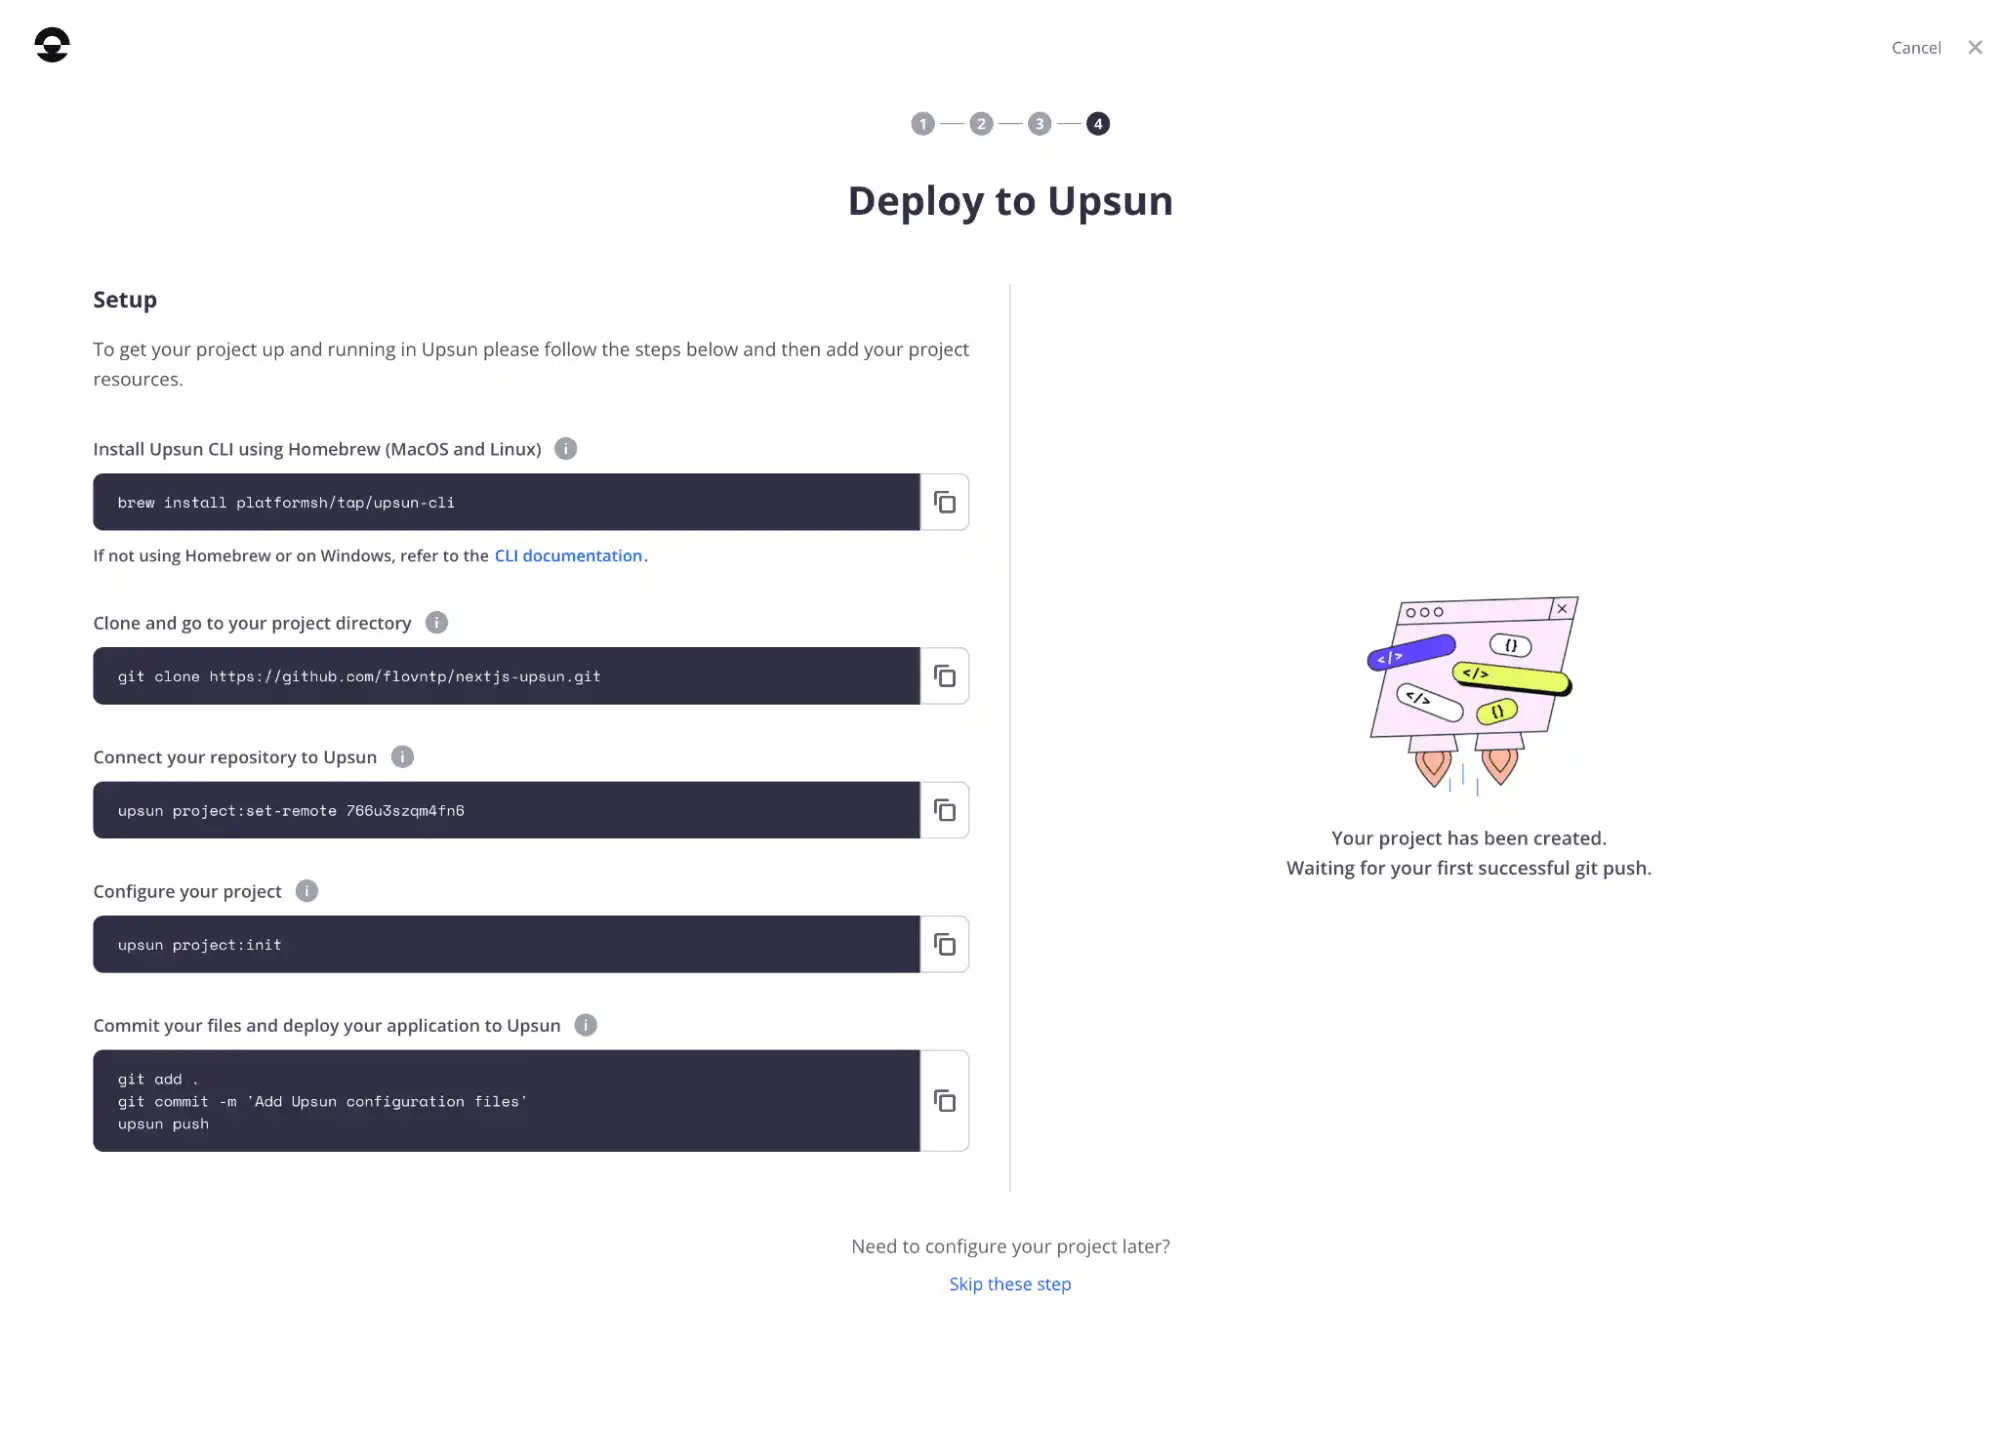
On the next page, while the project creation process is ongoing in the background, you will see on the left some further setup instructions, if you need them. On the right, you can follow the project creation process and you will be informed when it is complete, as seen in the screen below:

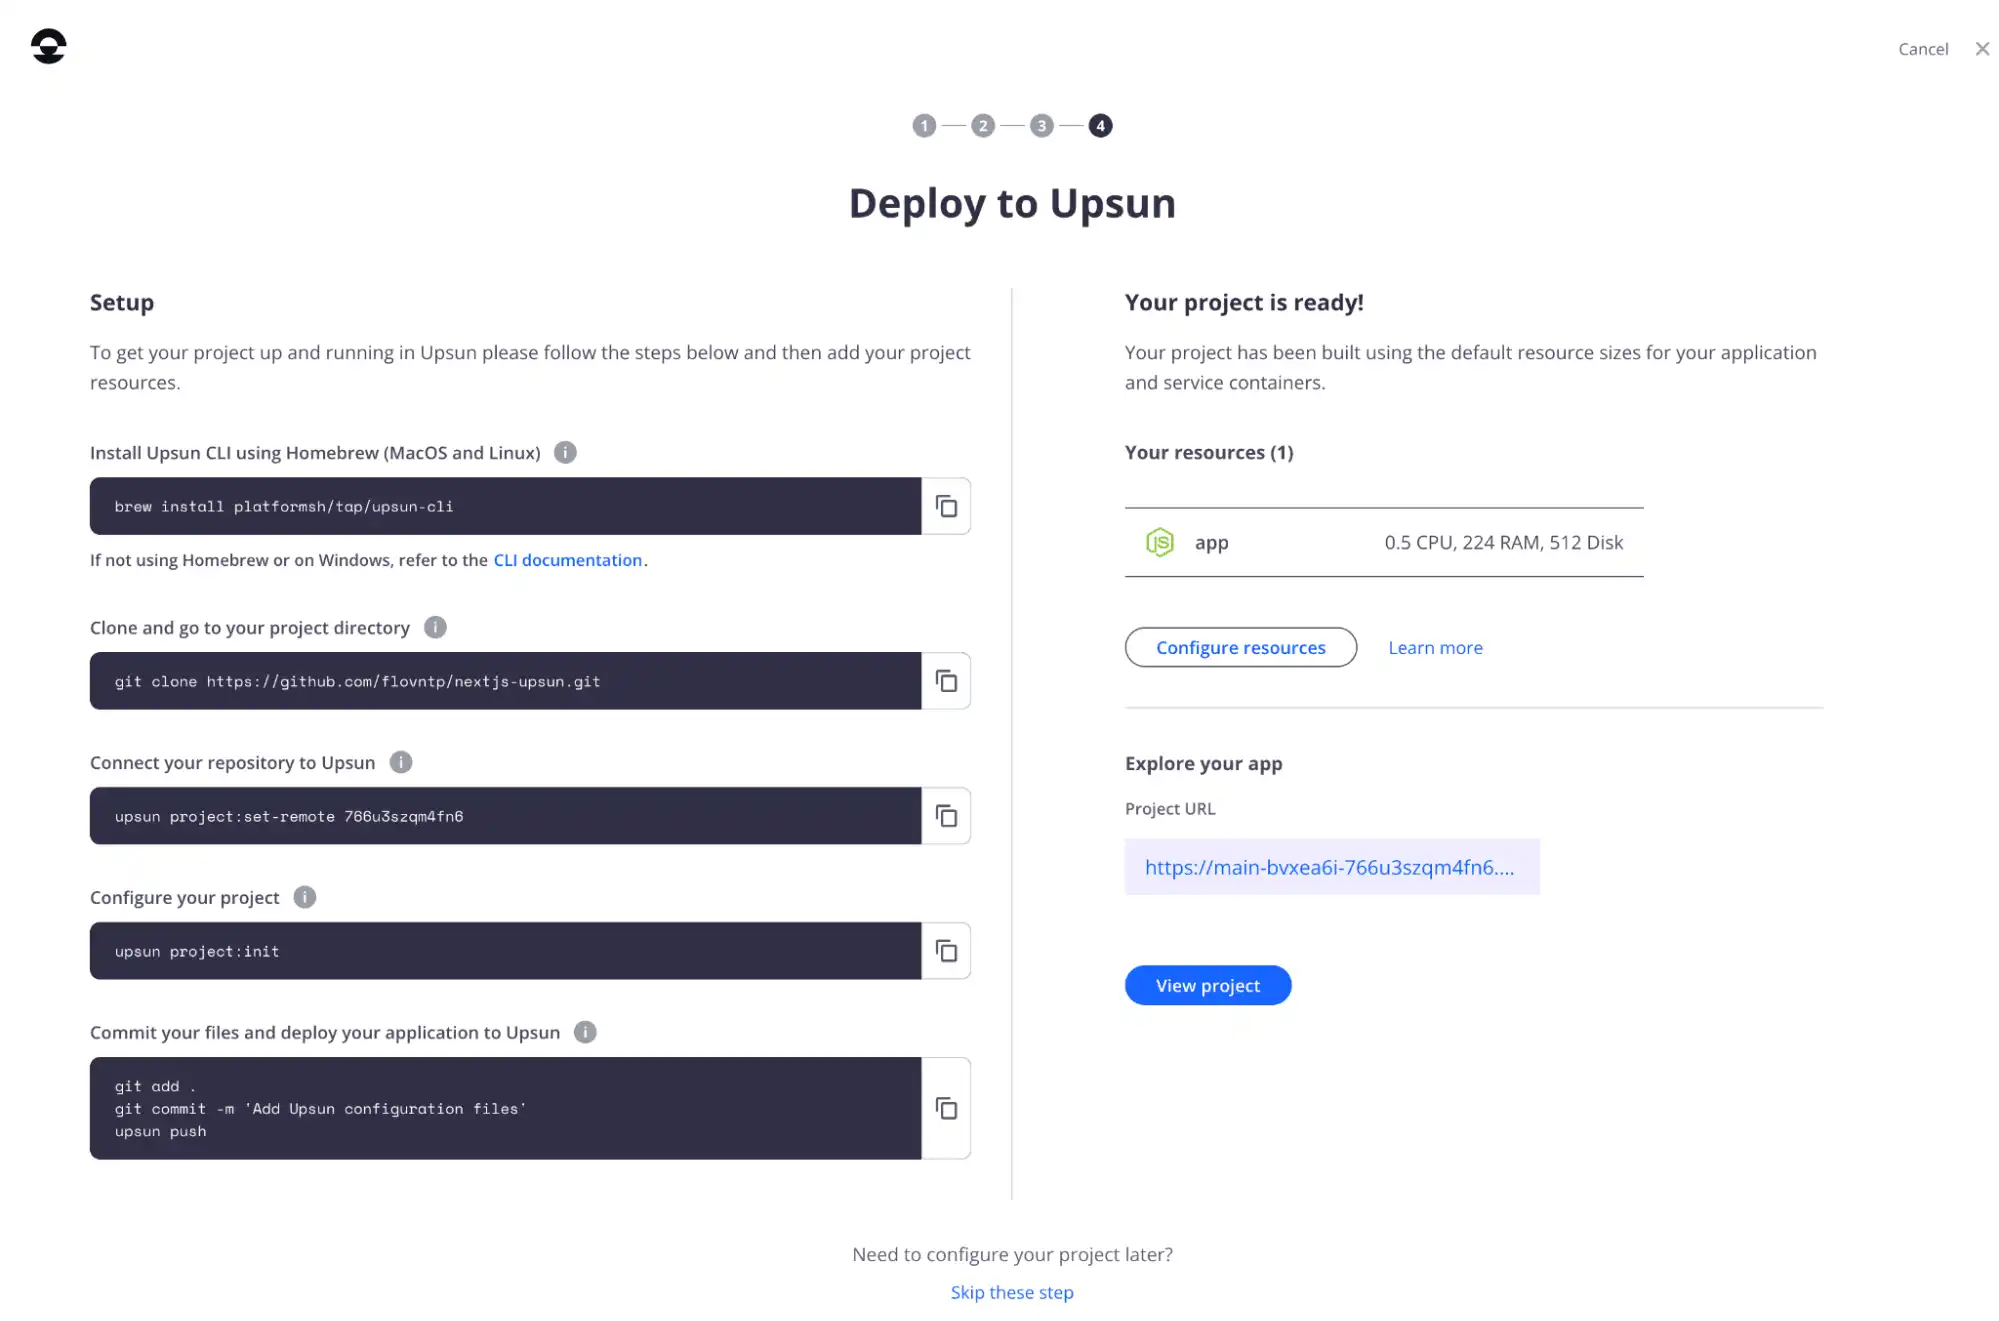
Once your project has been created, the GitHub integration process will automatically deploy your application based on your GitHub repository source code. Wait for the integration to finish deployment and it will then display your application information which you can see an example of in the screen below:

At the end of the process, please execute the following command to set the remote, using the Upsun CLI:
upsun project:set-remote <ProjectID>Time to deploy, right?
And just like that, it’s time to deploy! But wait…
As you already ensured your source code was Upsun-ready in the project configuration section of this guide, your project will have been automatically deployed during project creation and your application will already be live, with no deployment needed. Check out your new project URL at the bottom of the console interface.
The next step is to access your project console by clicking on the view project button at the bottom of the setup page, et voilà, your Express application is live and you can start playing around with it and adding lots of cool new features!
Useful links
Your greatest work
is just on the horizon

Join our monthly newsletter
Compliant and validated